Review of Zig Zag Machine Binding Technique
As I mentioned before, I recently tried out a zig zag binding technique. I used this tutorial, also by Rachel at Stitched in Color, but I remember seeing other zig zag tutorials before. So I thought I'd share my thoughts with you about how it went :)
First, she has you cut 2.5" strips for binding, fold them in half, etc., pretty standard. Some people prefer 3" strips, but I like skinny binding, so I've been doing 2.5" lately.
Then, she has you sew the binding, like normal, to the quilt top. This is what I would change (and was different in another tutorial I remember seeing). I would instead sew the binding to the back first - it'll make sense later.
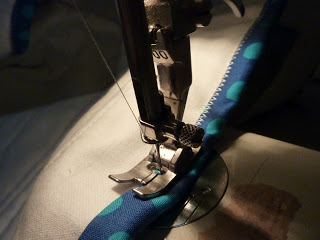
The last overall part of this tutorial is when she has you fold the binding over to the back, miter corners, etc. Then, you pin the binding just past the stitching from the other side, and zig zag over the edge of the binding. It should catch on the other side. My problem was that, every once and while (despite using a wide zig zag), it did not catch - because I'm not perfect!! And that meant I had some oopsies showing on the front of the quilt, because that is the side you can't see while zig zagging. This is why I would suggest instead sewing the binding to the back, because then you will be zig zagging on the front - it will look perfect, and any mistakes that happen will be on the back of the quilt.
For pinning, she suggests putting your pins parallel to the edge of the binding, with the head facing you for easy removal. It's a bit easier to get the pins in that way, since there's more room to work with. I ended up preferring to do them old fashion style (perpendicular) because, while a bit tricky to get them to go both in and out of the binding in such a small area, I didn't have to remove the pins at all. When I removed pins, my binding started creeping away....but not so much when I left the pins in. Of course, I hit a few and broke a needle and bent a bunch of pins, but that's my normal MO :D.
Overall, it was MUCH easier, much faster, and I really like the look of the zig zag for a modern quilt. Obviously, this wouldn't work for show quilts, and I feel like it might not look good on a traditional quilt. But the only thing that makes me consider continuing with handstiching the binding is that I can do that in front of the tv. While it was much faster to do it by machine, it was still a good amount of time to be sitting there, stitching one long, boring seam, since zig zagging takes longer. I might rather be able to spend that time in front of the tv, watching a movie! So the verdict's still out - if I can get better at my technique, I think the zig zagging will be worth it in the end.


