Raw-edge applique
I was having a great discussion a few weeks ago with Marjorie before leaving town abruptly for the funeral, and we were talking about trying different things. So, since lots of people have never done raw-edge applique, I thought I'd share exactly how to do it. It's realllllly easy and super fun!!! For starters, there are several versions of this technique, but I'll mainly share with you the method I used to make my do. Good Stitches blocks. I recently joined this bee as a way to reach my goal of making a charity quilt this year. Well, it won't be just one single quilt, but it will add up to about that - you make a few blocks each month and send them in to the bee leader, who pieces them together and quilts it for a final product, which is then donated. Super cool!
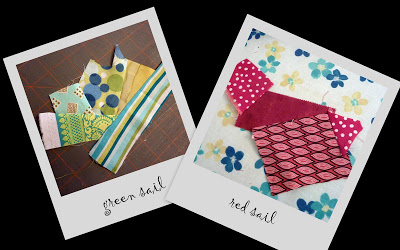
Another great thing about being in a bee is that you end up using techniques you normally wouldn't. I usually piece my quilts, and when I have appliqued, it's been fairly planned out. But I made these blocks with a little more freedom - and loved it! We were requested to make sail boat blocks with patchy sails:
So, here's the process:
Step 1: Decide on your overall finished block size and draw out your pattern.
Now, you don't actually have to draw it out ahead of time - I didn't the first time - but it can help. For example, I was immensely pleased with the first block, but if I had sketched out the second one, I probably would have seen that I wouldn't like it as much. So whatever method you prefer, but you definitely need to know the finished size! Our blocks had to be 10.5" so that they would be 10" when pieced. Then, cut out your pattern pieces.
Step 2: Complete the background
I knew that the block had to be 10.5", but I wasn't quite sure where I wanted the water line to be at since I didn't know how big my boat was going to be. So I made a "block" that was 10.5" wide, but extra long on both the white and blue sides to cut it down later.
Step 3: Create your scrappy pieces
Make sure your scraps have a similar overall color and value, or it will not read as one unified shape at the end. You will be sewing together a bunch of small scraps, in any way and order you like, until your fabric "blob" is larger than your pattern piece. Do this with any other pieces you would like to be scrappy. Have fun with it! If it isn't big enough, you can always just add more - no worries in this kind of quilting!!
Step 4: Cut out your pieces
Trace around your pattern pieces and cut out your shapes. I like to use an extra fine tip Sharpie marker - it shows up on everything!
Here's a tip for dark fabrics: flip it (and your pattern piece) over. The back is usually light enough to see what you are tracing! If it isn't, then I would suggest a white or light colored pencil.
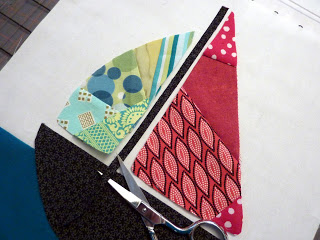
Lastly, for rectangular objects, I like to use a ruler to cut them so they actually look like a rectangle. I can't free hand those!! For example, in this project, I cut a 1/4 inch strip of the black fabric. Then, I laid out all my pieces to make sure I cut it the exact length that I wanted. Easy peasy :)
Step 5: Spray Adhesive
Oh yes. You know it. Lightly spray the back of all your pieces to be used.
But first, you may want to mark where your pieces will end up going. I used pins to mark two crucial points - the bottom of the boat and where the mast attaches. I can place the sails last, using the location of the mast as my guide.
Step 6: Attaching your pieces
 Place your pieces onto your fabric and lightly smooth them out. If place something incorrectly, you can always move it again - spray adhesive is great like that! It will just become a little less sticky each time you do this. Then, pick thread that matches the overall color of each piece. For example, I used a light green on the left sail. (On the first version of my block, I used white, but I didn't like how much it stood out). Make sure your bobbin thread (at least somewhat) matches as well. Now, topstitch closely to the edge of your piece. I stitch a little under 1/8 of an inch from the edge. Don't go too close, you'll just split the edge threads and it won't hold securely. Stitch all the way around each piece until you return to your starting point. You can stitch slightly over where you started, if you want, but I just stitched right up to where I started. Don't trim your ends yet...
Step 7: Finishing
As you go, or all at the end, you will want to tie off your ends. Flip your piece over and lightly pull on the thread to pop the top thread loop through. See it? Ignore my mismatching colors :). That orange thread is the one you need to pull through. Now, pull that through, tie them together, and cut off the ends. If you are worried about durability, you can always dab the knot with some Elmer's glue. If you started with a slightly larger than necessary background, now is the time to cut it down!
All done :)
Wasn't that fun?
P. S.
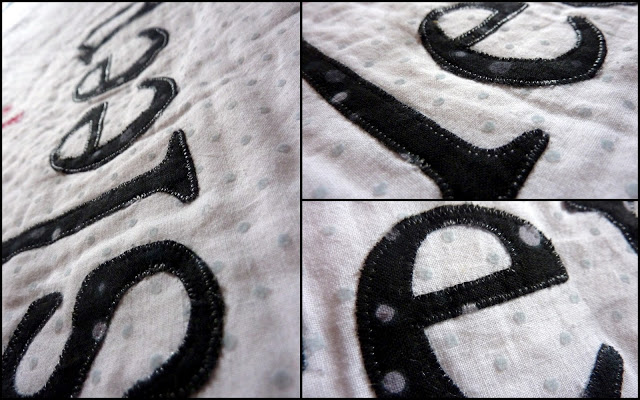
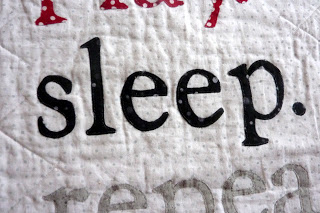
Raw edge appliqueing ravels a bit. If you don't like this look, you can try traditional needle-turn appliqueing or using a zig zag that catches the entire outer edge of each piece. This is what I did with the Eat, Play, Sleep, Repeat quilt. Here are a few pictures:
I used monofilament as my top thread and white as my bobbin, but decreased the top tension to prevent little white loops from peaking through to the top of the fabric. See how there is no raveling? And when you aren't right on top of the sewing, the monofilament just disappears:


